
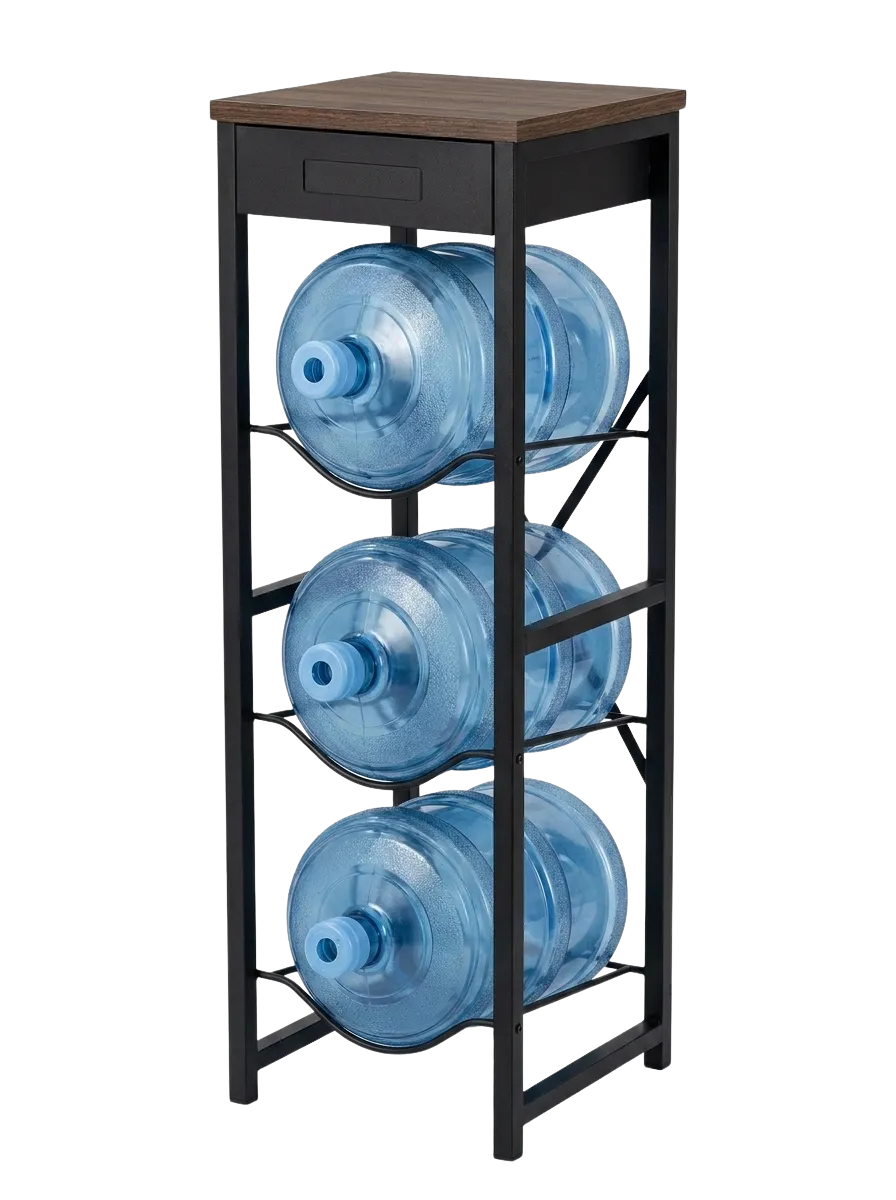
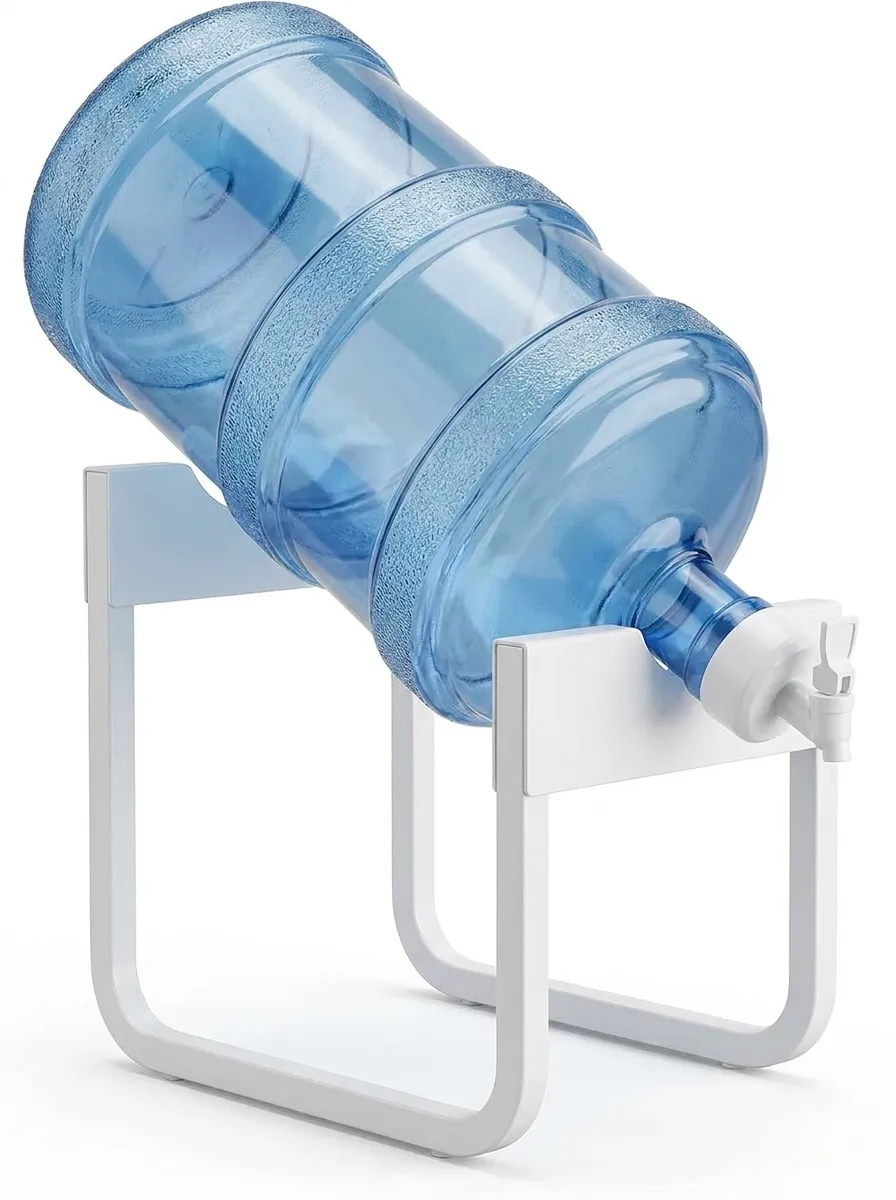
Bottle Rack Stand & Water Dispenser Holder
HOW TO BUILD
This guide walks you through the complete build process from start to finish. Read all steps before beginning. Ensure you have all required materials and tools ready before starting.
What You Will Need
Materials / Components
All included package components
Hardware/fasteners (included)
Any surface or mounting base
Power source (if applicable)
Tools Required
Screwdriver (Phillips & flat-head)
Pliers or adjustable wrench
Measuring tape/level
Safety gloves (recommended)
What You Will Need
Materials / Components
All included package components
Hardware/fasteners (included)
Any surface or mounting base
Power source (if applicable)
Tools Required
Screwdriver (Phillips & flat-head)
Pliers or adjustable wrench
Measuring tape/level
Safety gloves (recommended)
Parts List
Lay out and verify all parts before starting. If anything is missing, see the Missing Parts section below.
A
Top frame rail
x1
Bottle Rack Stand — Step 1
B
Vertical side frame panel
x2
Bottle Rack Stand — Steps 1 & 2
C
Horizontal crossbar
x1
Bottle Rack Stand — Step 1
D
Curved bottle shelf insert
x3
Bottle Rack Stand — Steps 1 & 2
E
Shelf support bracket
x1
Bottle Rack Stand — Step 2
F
Inner connecting rod
x3
Bottle Rack Stand — Steps 1 & 2
G
Screw (x4 per joint)
x12
Bottle Rack Stand — Step 2
H
Top tray / drawer shelf
x1
Bottle Rack Stand — Step 3
I
Screw for top tray
x4
Bottle Rack Stand — Step 3
J
U-bracket base (dispenser stand)
x1
Water Dispenser Holder — Step 1
K
Mounting arm
x1
Water Dispenser Holder — Step 1
L
Bolt & nut set
x4
Water Dispenser Holder — Step 1
M
Non-slip rubber foot
x4
Bottle Rack Stand — Step 3
Build Instructions
Common Issue
Screws (G) won’t insert into part B
Curved shelf inserts (D) feel loose
Frame is not square / wobbly
Top tray (H) sits unevenly
Water jug tips in the holder
Rubber feet (M) won’t stay on
A part appears to be missing
Recommended Solution
Ensure parts E and B are flush before inserting. Do not force — realign and retry.
Verify connecting rods (F) are fully seated in all slots before tightening screws (G).
Loosen all screws, re-square on a flat surface, then re-tighten in sequence.
Loosen tray screws (I), press tray flat, then re-tighten evenly in a cross pattern.
Tighten bolts (L) on the U-bracket. Ensure jug is centered in the bracket before releasing.
Press firmly for 10–15 seconds on a clean, dry surface. Wipe feet and leg bottoms first.
Recheck all packaging pockets. If still missing, use the Contact Us form — see below.
MISSING PARTS? If any part is missing or damaged, contact the Mivoro support team. Use the Contact Us form and include your order number and the part letter (e.g. Part G). We will ship a replacement at no charge.
Common Issue
Screws (G) won’t insert into part B
Recommended Solution
Ensure parts E and B are flush before inserting. Do not force — realign and retry.
Curved shelf inserts (D) feel loose
Recommended Solution
Verify connecting rods (F) are fully seated in all slots before tightening screws (G).
Frame is not square / wobbly
Recommended Solution
Loosen all screws, re-square on a flat surface, then re-tighten in sequence.
Top tray (H) sits unevenly
Recommended Solution
Loosen tray screws (I), press tray flat, then re-tighten evenly in a cross pattern.
Water jug tips in the holder
Recommended Solution
Tighten bolts (L) on the U-bracket. Ensure jug is centered in the bracket before releasing.
Rubber feet (M) won’t stay on
Recommended Solution
Press firmly for 10–15 seconds on a clean, dry surface. Wipe feet and leg bottoms first.
A part appears to be missing
Recommended Solution
Recheck all packaging pockets. If still missing, use the Contact Us form — see below.
MISSING PARTS?
If any part is missing or damaged, contact the Mivoro support team. Use the Contact Us form and include your order number and the part letter (e.g. Part G). We will ship a replacement at no charge.
Need further help?
Contact Us and submit a support request. Include your step number, a description of the issue, and any photos if possible.